

 Wika
Wika
How to Maintain a Universal Joint: The Complete U-Joint Maintenance Guide
Maintaining a universal joint comes down to three habits: grease a serviceable u-joint every 3,000 to 5,000 miles or at every oil change , use the correct NLGI Grade 2 lithium complex EP grease, and inspect for play, rust, or noise at each service interval. Following this routine is the single biggest factor separating a u-joint that lasts 150,000 miles from one that fails at 40,000 miles from neglect alone.
The rest of this guide covers how to grease a u-joint correctly, how to tell if a joint is already failing, and what maintenance schedule fits different vehicles and driving conditions.
How Often to Grease a U-Joint
Grease interval depends heavily on whether the joint is serviceable at all, and then on how the vehicle is used. Not every u-joint has a grease fitting — some are sealed for life and require no service, only inspection.
Recommended Intervals by Use Case
| Use Case | Recommended Interval |
|---|---|
| Standard daily-driver passenger vehicle | 5,000 to 7,500 miles (every oil change) |
| Towing, off-roading, or high driveline angle | 3,000 miles or less |
| On-highway commercial truck | 40,000 to 50,000 miles |
| After water crossing or submersion | Immediately, regardless of mileage |
The wide range exists because driveline angle and load are bigger wear drivers than time or mileage alone . A Jeep running a lifted suspension at a steep operating angle wears out grease far faster than a stock daily driver on flat highway miles, which is why off-road and towing applications call for intervals as short as 3,000 miles instead of the standard 5,000 to 7,500.
Choosing the Right Grease and Applying It Correctly
The recommended grease for u-joints is an NLGI Grade 2 lithium complex grease with extreme pressure (EP) additives , often specified as meeting ASTM D4950 LB or the GC/LB classification. This grade is formulated to withstand the high-impact loads and rapid rotational forces inside the joint's needle bearings, which an ordinary chassis grease is not built to handle.
Step-by-Step Greasing Procedure
- Wipe the grease gun coupler and the zerk fitting clean before connecting, so dirt isn't pushed into the bearing along with the grease
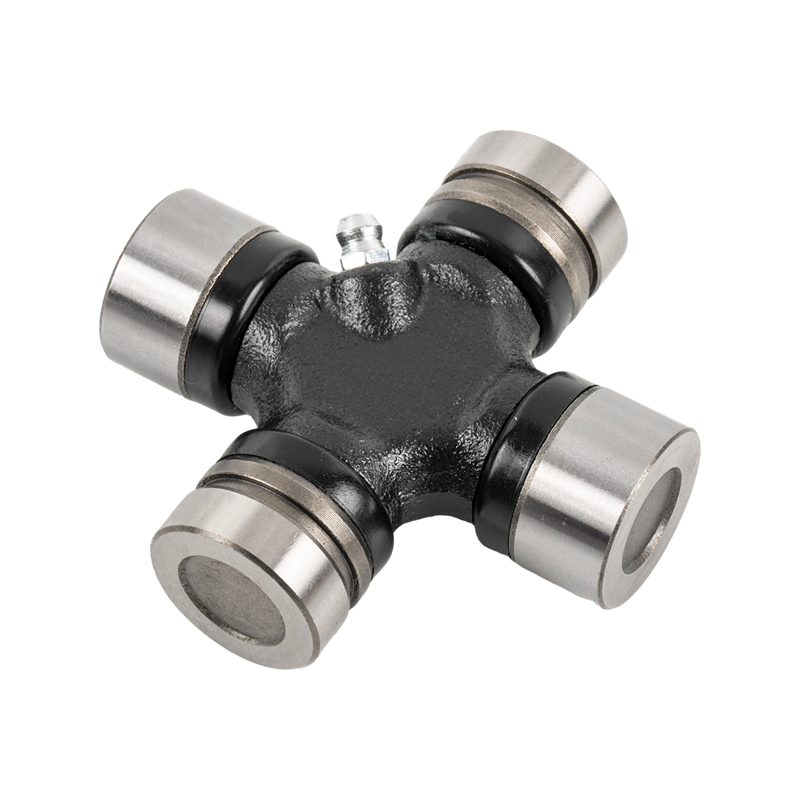
- Attach the grease gun firmly to the zerk fitting
- Pump slowly and steadily rather than in quick bursts
- Continue until clean, fresh grease purges out from all four bearing cap seals
- Wipe away excess grease from the seals and fitting once finished
- Check that none of the four caps was missed, since grease can take the path of least resistance and skip a dry cup
Fresh grease purging from all four seals is the only reliable confirmation that the old, potentially contaminated grease has been fully flushed out. If grease only emerges from the cap nearest the fitting, the other three cups may still be running on old or contaminated lubricant, which defeats the purpose of the service.
The old grease purging out is also a useful diagnostic. Grease that looks black with a burnt odor, has a gray metallic tint, or shows signs of moisture contamination indicates accelerated internal wear, even if the joint isn't making noise yet.
Recognizing the Warning Signs of a Failing U-Joint
Maintenance also means catching a joint that's already going bad before it strands the vehicle or damages the driveshaft further. The three most common symptoms are a clunking noise on gear changes, a squeak or click at low speed, and vibration that intensifies with road speed.
Common Symptoms and What They Indicate
| Symptom | Likely Cause |
|---|---|
| Clunk when shifting into drive or reverse | Excessive play between the cross and bearing cups |
| Squeak or click under 10 mph | Dry bearings from lost or degraded grease |
| Vibration that grows with speed | Driveshaft imbalance from worn needle bearings |
| Rust powder or discoloration around the caps | Moisture intrusion, often from a torn seal |
| Transmission fluid leak near the driveshaft | Vibration has damaged the transmission output seal |
Vibration from a bad u-joint is worth distinguishing from other common causes: u-joint vibration typically comes through the floor and reacts to throttle changes, while wheel imbalance shows up mainly in the steering wheel at a steady speed . Since a driveshaft spins three to four times faster than the wheels, u-joint noise is also higher-pitched than most other drivetrain sounds.
How to Physically Inspect a U-Joint
A hands-on check takes only a few minutes and doesn't require special tools, but it should be done safely with the vehicle properly supported and the transmission in neutral or park with the parking brake engaged.
Inspection Checklist
- Locate every u-joint on the driveshaft: at the transmission, transfer case, carrier bearing if equipped, and differential yoke
- Use a flashlight to look closely at all four bearing caps on each joint for cracks, rust, or discoloration
- With the vehicle safely supported, grab the driveshaft near the joint and try twisting it back and forth while holding the yoke steady
- Feel specifically for play in the joint itself, not the normal backlash that exists in the transmission or differential
- Check the grease seals for tears, cracking, or leaking grease around the edges
- Inspect the carrier bearing rubber mount on two-piece driveshafts, since a torn mount can cause similar vibration symptoms
Any felt movement at the joint itself, not just general driveline slack, is the clearest sign a u-joint needs replacement. A joint in good condition should rotate smoothly with resistance, without clicking, binding, or looseness when twisted by hand.
Maintenance Mistakes That Shorten U-Joint Life
Beyond simply following an interval, a few common mistakes account for most premature u-joint failures on otherwise well-maintained vehicles.
Errors to Avoid
- Assuming a dealer service always includes greasing the u-joints; many technicians skip this step unless specifically requested
- Using a general-purpose or moly-heavy grease instead of the specified lithium complex EP grease
- Stopping the grease gun as soon as resistance is felt, before fresh grease has purged from all four caps
- Continuing to add grease as a temporary fix once clunking or vibration has already started, rather than replacing the joint
- Ignoring the joint after a water crossing or off-road trip through mud, which can force water past the seal
On the replacement side, u-joint parts themselves typically cost under $50, though professional replacement including labor runs $200 to $450 . That gap makes routine greasing an easy way to avoid an otherwise avoidable repair bill, and delaying a known-bad joint risks far more expensive damage if the driveshaft drops entirely.